
Power Automate : Convert PDF to Text with Python
- Alibek Jakupov

- Feb 10, 2023
- 4 min read

Power Automate is an online workflow service that automates actions in the most common applications and services. For example, you can create a flow that adds a lead to Microsoft Dynamics 365 as well as a record in MailChimp every time someone with more than 100 followers tweets about your company.
When you sign up, you can connect to over 500 services and manage data in the cloud or in local sources like SharePoint and Microsoft SQL Server. The list of applications you can use with Power Automate is constantly growing.
You can use Power Automate to create automated workflows between your favorite applications and services, get notifications and information, synchronize files, receive notifications, collect data, etc.
For example, you can automate the following tasks:
Instantly respond to high priority notifications or emails.
Capture, track and follow up on new leads.
Copy all email attachments to your OneDrive Enterprise account.
Collect data about your business and share it with your team.
Automate approval workflows.
Power Automate is commonly used to receive notifications. For example, you can instantly receive an email or push notification on your phone when a lead is added to Dynamics 365 or Salesforce.
However, most of the services require a Premium plan. And yet, even if you have a Premium subscription you may still need to pay extra fees for using some extra features.
For example to extract the text from PDF you will need to pay the Premium subscription and also the licence price to an external vendor providing such facilities. Pretty annoying, right? Some internet resources suggest complicated workarounds, like converting a PDF to a Word, and then uzipping a Word file, which never works in real life. Sometimes, as an engineer, you just can't help yourself but to start building. So up we go!
Our imaginary scenario is quite straightforward: once an email arrives, we extract the attachements in the PDF format, and then convert them into text using a Python snippet.
Trigger
First, create a trigger.
Sign in to Power Automate.
On the left pane, select My flows.
Select New flow > Automated cloud flow.
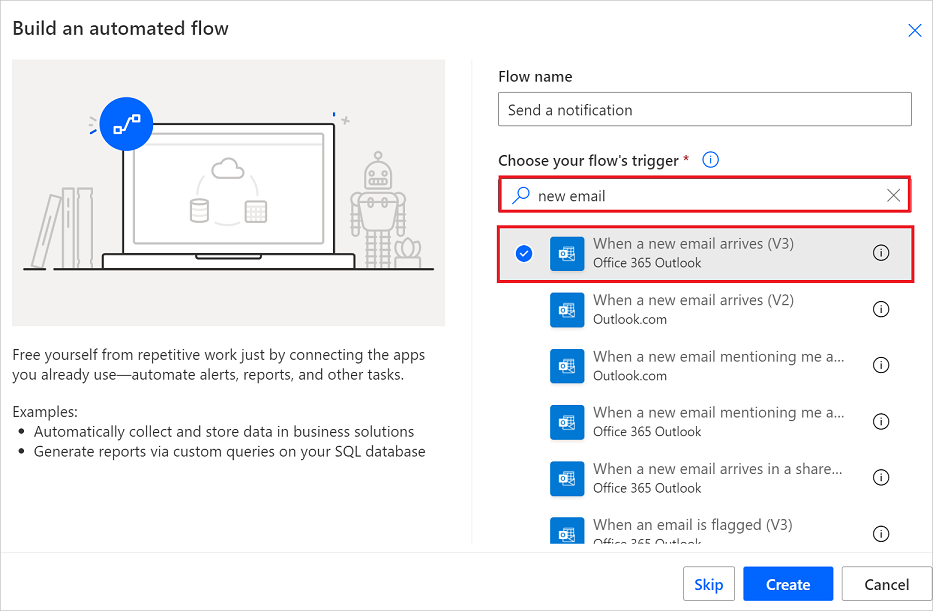
In the Flow name field, enter a name for your flow.
In the Choose your flow's trigger field, enter new email.
Select When a new email arrives (V3) from the list of triggers. This trigger runs each time an email arrives.
Select Create.
Get Mail Attachments
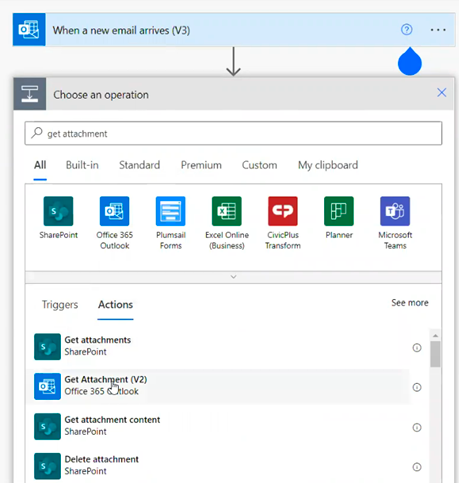
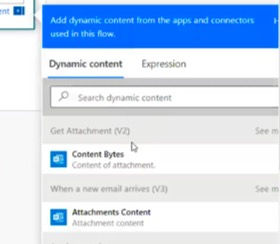
Then, click on Next step to create the next action. In the Search textbox type get attachment. Select Get Attachment (V2).
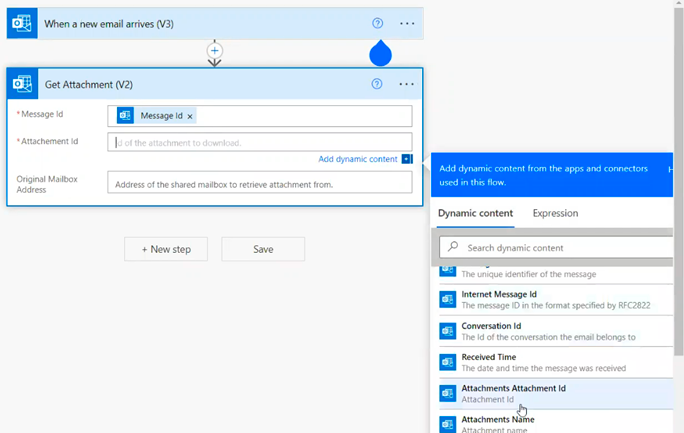
Select the Message Id from the dropdown for Message Id and Attachments.Attachment Id for the Attachment Id.
If you try executing it now and then analysing the outputs, you will notice that the content bytes is in a strange format. This is called Based64 and, to be honest, this took me a while to finally figure it out. In computer programming, Base64 is a group of binary-to-text encoding schemes that represent binary data (more specifically, a sequence of 8-bit bytes) in sequences of 24 bits that can be represented by four 6-bit Base64 digits. Common to all binary-to-text encoding schemes, Base64 is designed to carry data stored in binary formats across channels that only reliably support text content. Please note this, as we will need it further.
Develop an Azure Function
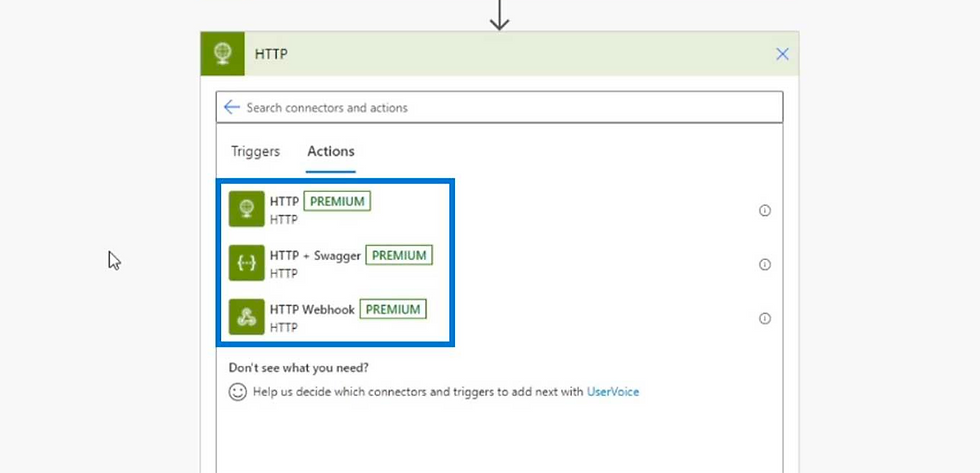
Now we will write a Python code to extract the contents of the PDF. To do so we will add an HTTP action and create an Azure Function which will expose an API that will be accessible from Power Automate. If you don't know how to create an Azure function, please refer to the following tutorial.
First create an http-triggered function from a template. As we want our code to be as clean as possible, we will create the helpers folder and put our filer helper file there (I called it file_helper.py). Note: the helpers folder should be in the same directory as your host.json.
Now, put this code into your file helper:
from PyPDF2 import PdfReader
from io import BytesIO


def fix_eof(contents):
    """Fix the EOF issue with PDF files

    Args:
        contents (bytes): pdf file contents

    Returns:
        contents (bytes): fixed contents
    """
    EOF_MARKER = b'%%EOF'
    contents = contents[:-6] + EOF_MARKER

    return contents


def bytes_to_file(bytes):
    """Convert bytes into file-like object

    Args:
        bytes (bytes): bytes array obtained from http request

    Returns:
        io.BufferedReader: a file-like object
    """
    return BytesIO(bytes)


def pdf_to_text(stream):
    """Convert pdf byte stream to text

    Args:
        stream (io.BufferedReader): a pdf file object

    Returns:
        full_text (str): text contents of a PDF file
    """
    pdf_reader = PdfReader(stream)
    total_pages = len(pdf_reader.pages)
    full_text = ""

    for i in range(total_pages):
        page = pdf_reader.pages[i]
        page_text = page.extract_text()
        full_text += page_text

    return full_text
As you may have noticed we are using the PyPDF2 library so don't forget to update your requirements.txt.
Now go to your main function and put the following code:
import logging
import traceback
import base64

import azure.functions as func

from helpers.file_helper import pdf_to_text, bytes_to_file


def main(req: func.HttpRequest) -> func.HttpResponse:
    req_body = req.get_body()
    req_body = base64.b64decode(req_body)
    try:
        pdf_contents = pdf_to_text(bytes_to_file(req_body))
    except:
        logging.info(traceback.format_exc())
        pdf_contents = str(type(req_body))
    return func.HttpResponse(pdf_contents)
Please pay a special attention to this line
req_body = base64.b64decode(req_body)As you see we are converting it from Base64 to bytes, which is very important, otherwise you will keep getting the "EOF marker not found" error. Now publish it and get the url.
Get Text from Email
Finally, you only need to to add an HTTP action to your flow
Provide the following parameters:
Method: POST
URI: <your function URL>
Headers: Content-Type - application/octet-stream
Body : Get Attachment (V2) -> Content Bytes
Now when you execute your flow, you will get the contents in a string format, works like a charm.
In this tutorial we've seen how to add some custom Python code to your Power Automate flow using Azure Functions. This workaround not only allows you doing some basic steps, like extracting PDF contents, but also more sophisticated operations like OCRising your images, or getting a textual description of a photo, all that without using external providers' solutions. Hope this was useful. May the force be with you.


Comments